Hello everyone out there. I am Kevin, the Hubby of the Nuthouse Creator and head instigator, Lorin, and this is my debut post. I am also known as the procrastinator. I am really a Johnny-on-the-spot person when it comes to helping others or my full time job. When it comes to the domestic work projects ….I am kind of like the kids coming home from school with chores to do. Those 5 million things-to-do that Lorin talks about? Those are also my things-to-do, by default. As I sit here typing and reflecting, a little voice inside me just reminded me that our 37 year anniversary will be here shortly and I inwardly reaffirm that I really wouldn’t want to change a thing. Well, maybe it would be cool to have that voice changed to an English accent. Grin

Onward to the subject of our current post of: Fence building.
There are some really cool items available that look like they will last and promise to be time savers when building a fence. I incorporated them into this fence and want to share this experience. Ideally, I can give updates as to their effectiveness and longevity in these situations.

the plan
The yard plan had always been to have a fence across the back yard along the alley. And like most planning conducted here at the nuthouse it had to be flexible. Time, design, materials and purpose are all for grabs. Our methodology sometimes reminds me of those cooking shows where contestants are given the craziest ingredients to create a fantastic entrée.
Host: “Todays challenge will be to make a cedar picket fence that is structurally sound, possibly have a short lifespan that utilizes a mixture of on-hand materials blended with other inexpensive parts. You will have one afternoon following a marathon week at work…..and your time starts now, GO”
Me: “Uh, Ok”
I like learning about and researching new ‘things”. Whether I’m at the hardware stores or on the internet, I’m soaking it all in. Lorin calls it wasting time, or “dinking,” on my day off. Maybe a little bit, but like a good friend of mine, I too collect and store lots of tidbits of information for future use.
the design
- First, we needed to get our vehicles off the street in front of the house. Those of you that endure long winters can commiserate with having berms around your parked vehicle when you missed the notice of the snow plow coming. The important thing to take into account is: This would require at least a 23’ depth from the alley for my truck. A lot of the yard.
- Second, I didn’t have time for a proper fence post set up, with gravel and concrete, but it needed to handle the high winds and snow that would abuse it
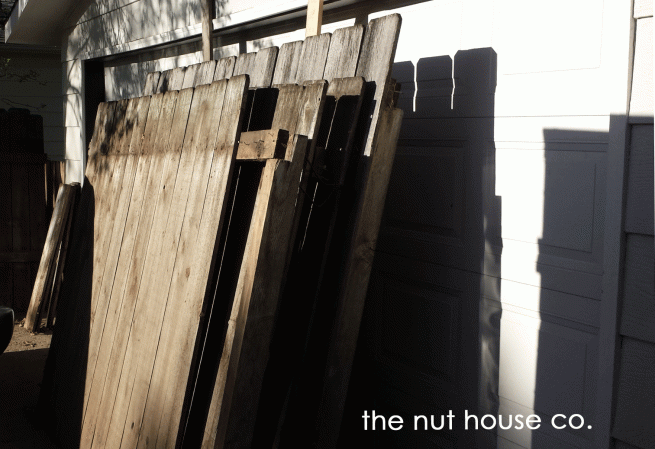
- Third, the pickets were all going to be recycled from the old fence which would entail shortening due to rot on the bottom edge and removing lots of nails.
- Fourth, was the cost. We always save money where we can, but I have little patience spending dollars to save dimes, at least with old materials. There’s that little voice again; “But what about the hoard of used materials she has on hand”? Just go with the flow and keep smiling as you rearrange and move stuff around for her.
- Lastly, incorporate new techniques and technologies. Note: this sometimes directly conflicts with cost controls. Grin
the posts
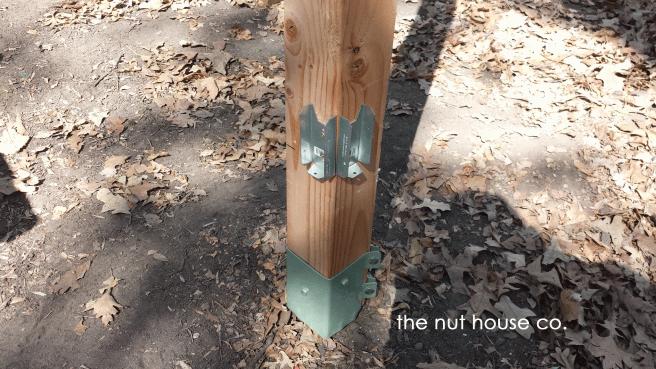
I didn’t want to just bury the 4×4 posts in the dirt because they rot astonishingly fast and as I said before I didn’t have time for concrete with a gravel base. I decided to use a different approach, fence spikes. These are welded and coated steel spikes that have a pocket that clamps onto the post. They are made by several companies and come in a variety of colors. I have used them to replace a rotted post before, without disassembling the fence with great results! You put a short piece of 4×4 in the clamp and beat it in the ground with a large sledge hammer. Pros: fast installation and stable in the ground. As a bonus because keeps the wood out of the dirt it allows use of shorter, non-pressure treated wood, which almost offsets the cost of the spike. The cons: you need some decent short pieces of 4×4 scrap and using a sledge hammer to beat it in the ground plumb and oriented correctly can be challenging. They do make an adjustable model to correct those issues and we tried one out, as well.
We planned out the fence in a zig-zag fashion, for stability, and it would tie into the existing fence where a post was but had rotted out. This was at the depth from the alley for the pickup truck. It would cross for about 14’ then jog back toward the alley then back to where the gate would be situated off the corner of the garage. It would allow cars to be parked there and still have a large gate for entry into the back yard.

I started by removing a couple pickets and cut off the rotted portion of the existing fence post, with a reciprocating saw, and pushed the fence out of the way. Then, I pounded in a spike centered where the old post had been and followed that by lifting the fence and placing the post in the clamp of the spike. This gave me a solid place to start the new fence. Pounding in the posts went as planned and it wasn’t that hard to keep them aligned though you will need, at least, one short scrap piece for each spike. I went through 9 pieces for 7 spikes. The one adjustable spike we installed required some extra steps but is easier to align and plumb vertical and the cost is not that much more. However, the last post that I intended for the, frequently used, gate at this point does not seem solid enough for hanging a gate. I think the soil there is just not as solid and because of this; I did not hang a gate until I see if more stabilization is necessary or even replacement of the post.
the rails
I wanted to use the existing rails because we have fully assembled old fence panels on hand. That didn’t work out due to post spacing and they were rough cut, so I just used new 2x4s. This worked out well also because I wanted to use some metal brackets from Strong Tie for fence rails. You find them in the sections for hurricane tie downs and such. End pockets, T-brackets for middle posts and corner brackets were the new items I found to test here. All these are designed to fit rails made of standard 2x4s and posts of standard 4x4s.

The T- brackets are especially nice to repair a fence that has had numerous problems with rail-ends splits, etc. Of course, these would all be attached using some new style, high-tech fasteners that “I just had to have”. Yes, I admit to having a fetish fascination with new fasteners.
the pickets
The cedar pickets we used were some we had salvaged and most were still mounted on rails. Lorin received lots more unwanted experience removing nails. Once nail free, I trimmed all the bottoms to a uniform length before nailing them onto the rails.
the actual work
Layout was pretty simple and fast. Mark the corners, or transition points and pull a string line between them. I then divided that distance in half or thirds. I was not really concerned if those were the same spacing as the next run of the fence because I had to make new rails, they just had to be close. Now I will say that, beating in those spikes can be “challenging”. You might want to enlist the help of someone if you are not that strong or have experience with a big hammer. If you watch how you hit it, you can correct any misalignment or angle as you get it going down. One of these I restarted 3 times because it kept pounding in crooked. The spike with the adjustable pocket had to be straight and tight before being pounded in. Then, after removing the wasted wood, loosened and realigned.
If I had more time I would have leveled the ground, or at least the fence route. As it was, it followed the unevenness and required that each post be cut to make the tops all level. You can use a string line and line level for this. In addition, I modified the clamping portion of the spikes by drilling a small ¼” hole on each side of the 6” deep pocket and installing a 1 ½’ lag screw into the sides of the post after clamping. I hope this will help maintain the vertical plumb in the weather and wind we get here in North Dakota.
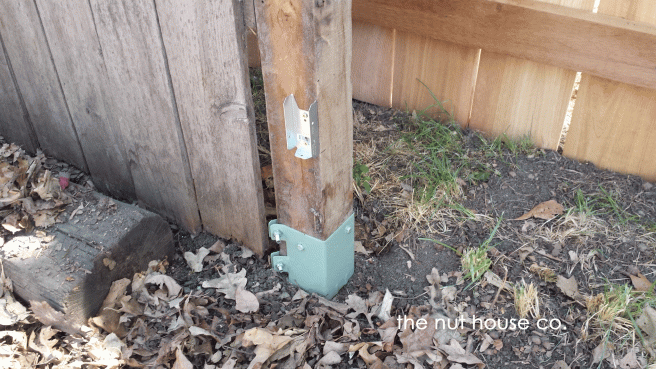
To install the metal hangers, I measured down from the top, and marked the two places I wanted the bottom of the rails to sit. Using the cool screws, I attached the end hangers, middle brackets and corner brackets at those marked levels. The rails had to be individually cut to fit and screwed into the hangers. At this point the frame of the fence was solid and strong.


Lorin had been pulling nails most of this time and was starting to feel it. She has this amazing ability for her patience and energy levels to go from great to zero in a short period of time. Kind of like these new Lithium-ion batteries. Coincidentally, her temper does just the inverse of her energy levels. At this point that little voice was sounding off. Smiling, I offered that since we were so close to finishing, I would continue with the nail removal and reattachment to the new frame and she should get something to cool down with. Really there just a few more pickets to remove nails from and it was a quick job to uniformly cut them shorter to remove the old rot.
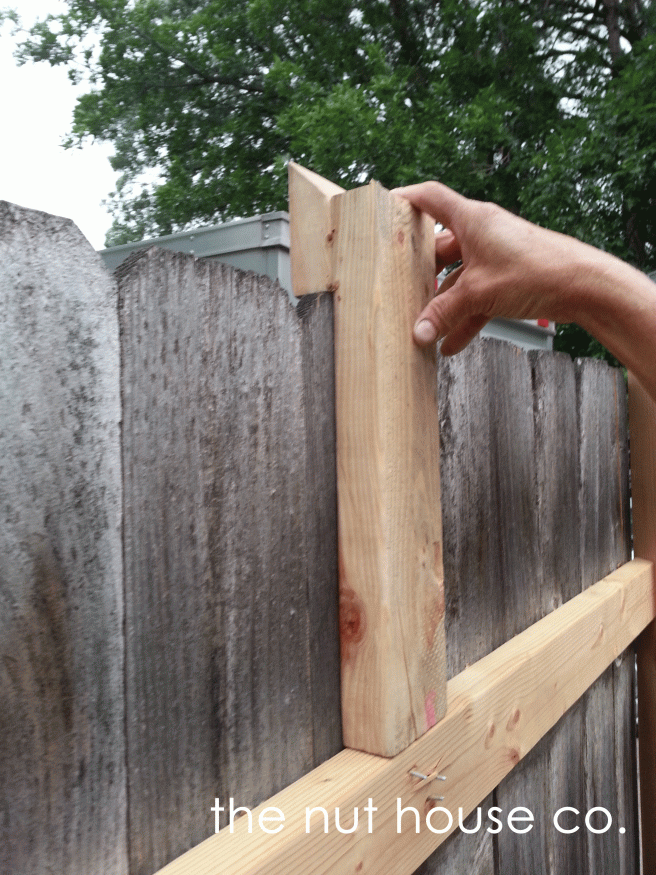
I took a couple of the pieces from the rails and nailed them into a jig. This jig allowed me to place it on the top and backside of each picket and act as a vertical spacer. I then could hold the picket with one hand resting it on the rail and nail it with the other hand.
I admitted to you that I have a “thing” for fasteners. I also have a “thing” for tools. I grew up that way; it is multi-generational in my family. My dad literally started a tool rental center utilizing the tools I grew up using! Like a good squirrel I collect all the nuts I can too. Pawn shops are a great place to look for tools. Months before I had found a Bostich coil-nailer at a local pawn shop for a great deal, 50% off the already low marked price. I had promptly bought a case of nails, sized for fencing, at Home depot, and squirreled it all away for just this purpose. I brought it out with the small portable compressor I had been using for trim work.
Yes, it would have been easier with two people but I had those pickets all up before Lorin had cooled down and returned to “see how things were going”. The last touches were to place the metal caps and solar lights on top of the posts to shed water. The gate will wait until I determine that last post will be sufficiently strong.
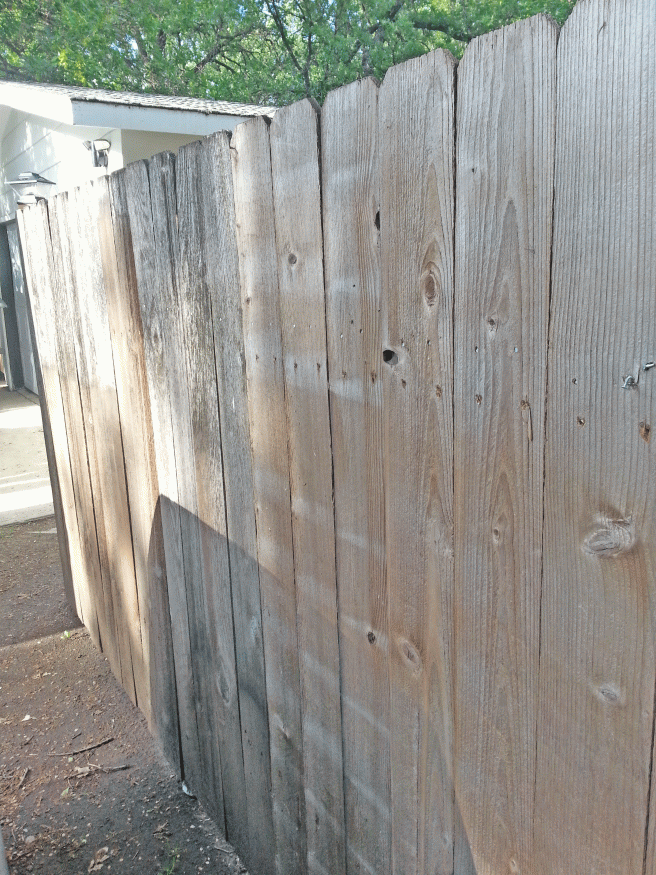
Overall, we accomplished the challenge. We kept the costs less than $150, recycled lots of old fence pickets, tried out some new techniques and materials and wore ourselves out. I was just another weekend under the whip direction of the head nut. Grin.
When Lorin gets it stained the dark charcoal gray to match the fence she already stained, it should protect the wood during the upcoming winter.
Check out Lorin’s post about why this all came together! not gardening, but fencing
Keep things nutty in your life!
Kevin


Thanks Kevin for the fence post, this is a way easier plan than I was looking at. Any idea as to the max winds it could withstand? Also what about screwing it together for added strength?
LikeLike
I’m old school concert coast less and makes a much more sailed fance.
LikeLike
Awesome information on setting up fencing post
LikeLike
Hey Kevin, we are down in SD aka the good Dakota. Black Hills area. What was the verdict on hanging the gate? I’ve looked at those spikes but never had much faith in what I saw, especially in a very windy area.
Great Post. Grin
LikeLike
I haven’t heard of these before, thank you for your post,great job!
LikeLike
thanks for this article.
i did not see it this way this is a good way to keep it cheep.
greetings from holland.
LikeLike
Where did you find the spikes and how much was they?
LikeLike
Good job. I am a woman and have never had to build a fence yet, and I liked that you posted picture of new post holder(green pick). That is an awesome item. I did see a post for a mix (2 part like epoxy) that foams up around your beneath the ground post. Then once cured (only took two hours) it was strong enough for the man in the video to imitate a post dancer move. Me and my spouse end up arguing during fix it jobs – but it turns out OK. Thanks for posting and keeping it real.
LikeLike
Very nice funny and informative thank you both! I haven’t read the nut house but I plan to check it out, thank you again. 😊
LikeLike
Kavin it’s a really informative post in so much depth. Thank you so much as we are planning to install our new fence this summer. Our is getting really old.
LikeLike